Important!
Unless otherwise stated here, the latest recommendations in AMA Hus (JSC.6) apply.
- The underlay roof is installed hanging over the rafters with a slight sag. Not completely flat on solid wooden surfaces!
- The roof's surface layer determines the minimum slope for the underlay, but it must always be at least 14° (1:4).
- X-Foil Roof is a diffusion-tight underlay roof where optimal function requires ventilation (at least 25 mm). Ventilation should occur from the eaves to the ridge.
- Load the surface gently and seal immediately, addressing any damage. Small damages are repaired with repair and sealing tape recommended by TECCA (T-Flex Uv). For larger damage, replace the entire sheet between the rafters with a new piece.
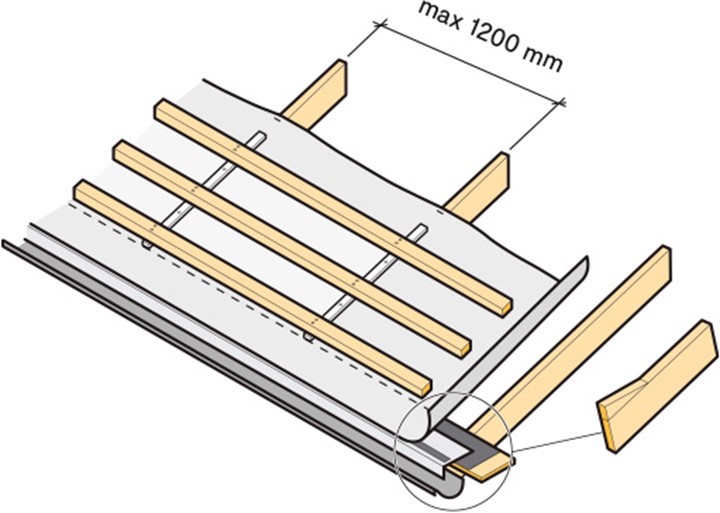
- X-Foil Roof meets the requirement for fall-through safety when all fixing such as nailing and battening (nail and load-bearing battens) of the membrane is complete! The maximum c-distance for roof beams is 1200 mm.
- No depressions or backfalls should form in the underlay roof during fastening and fixing.
- Rolls should be stored protected from sunlight (UV) and precipitation.
- After installation, the underlay roof must be completely enclosed and protected from sunlight (UV-). The maximum exposure time (UV-) before covering is two months.
- Always cover with the surface layer as soon as possible to avoid the impact of bad weather. Consider the unsealed overlaps and the risk of penetrating rain during wind!
- TECCA T-Butyl splice tape is an approved splicing aid and sealant.
- Screwed battens can be used to improve the fixation and tightness against the substrate in difficult weather conditions.
- The use of TECCA Distance for underlay roofs is recommended centered under at least every other
Support battens (approximately 2 pcs/m² roof) for better fixation of the sheet and its overlap between the rafters.
1. Start installation
Coverage is done horizontally starting at the eaves. First, attach custom wedges to the ends of the rafters. Then, an eaves board (Construction Plywood or wood tongue and groove) with a drip edge above and as a drip edge (with a drip edge strip underneath). The height of the wedge and the thickness of the eaves board should together correspond to the thickness of the battens and a roof tile. The eaves board should be wide enough to reach about 10 mm below the lowest batten and edge. After this, any gutter hooks are installed. The underlay roof should be rolled out with the printed side up, stretched well about 20 mm from the bending edge of the drip edge. Attach sparingly but as needed with staples (12.9 x 10 mm, c-distance 50 mm or 16.5 x 19 mm, c-distance 100 mm) to the rafter. Cut manageable lengths for handling on the roof and add an extra +100 mm at each gable rafter. The lower edge of the sheet is fastened down to the drip edge with double-sided T-Butyl Joint Tape.
The underlay roof is fixed with shorter battens (min 22 x 45 mm) and ends before the marked chosen overlap or marked line for overlap. Lengths according to the battens. Then fasten the battens over the underlay roof to the rafters with hot-dip galvanized wire nails 63 x 2.8 mm c-distance 300 mm. The counter battens (min 45 x 70 mm) are then fastened with 2 x hot-dip galvanized nails 100 x 3.4 mm at each rafter attachment point.
2. Subsequent sheets
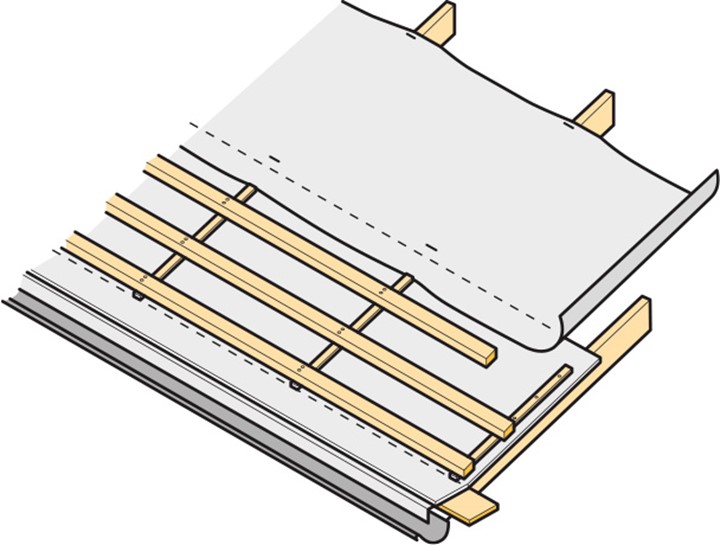
Roll out the next sheet with overlap adjusted to the chosen overlap. Measure down from the top edge of the lower sheet. At a 14°–26° slope, a total overlap of 200 mm is required, and at a ≥27° slope, the minimum overlap is 150 mm. Adjust the sheet evenly and attach it to the rafter with staples. Ensure that the overlapping sheet follows the slight sag of the lower one between the rafters. Complete the stapling. Further fixation to the rafter is done with battens (up to the next line for overlap).
3. Cross joint and underlying insulation
Where cross joints are necessary, execute them well. Joints and overlaps may only occur over the roof truss/beam with an extra 100 mm flap on each side of the truss. Fold down the lower flap and fasten
against the beam with hot-dip galvanized roofing felt nails at least 20 x 2.8 mm and c-distance 80 mm. The upper sheet is clamped at the overlap of the counter battens according to item 1 (Start assembly). Over the truss and between the sheets, T-Butyl Joint Tape is placed as a seal!
4. Gable
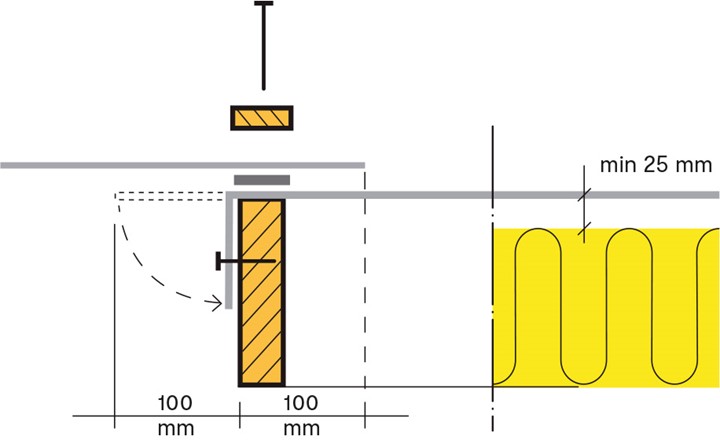
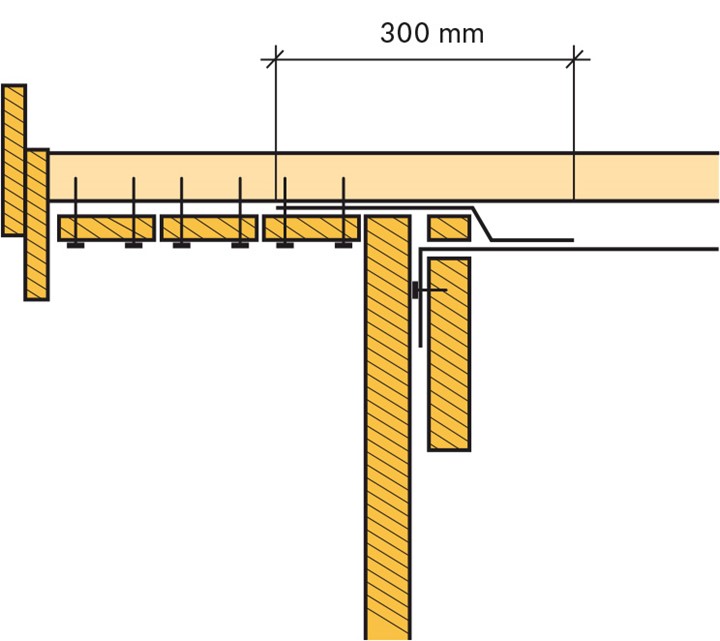
The flap edges (100 mm) at the gable truss are folded down on the outside and fastened with hot-dip galvanized roofing felt nails at least 20 x 2.8 mm and c-spacing 80 mm. As a protective transition between the gable peak and the underlay roof, a strip of the same material (approximately 300 mm) is installed. The strip should be drawn from and over the nearest lower cladding board on the gable peak at least over the underlay roof by 200 mm.
5. Ridge
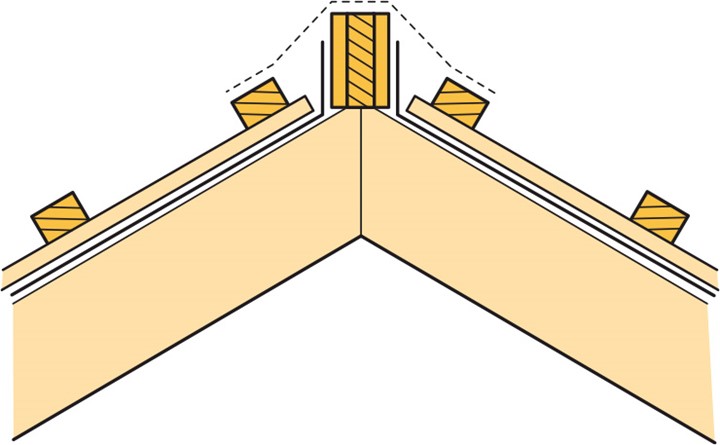
The cam should be mounted open for ventilation. Spacer blocks (25 mm thick, 95 mm wide) are attached
on each side of the ridge board and with a c-distance of 600 mm. The height of the blocks should be adjusted according to
the shape of the overlying ridge tile. They can be placed slightly lower than the top of the ridge board. The underlay is pulled up on each side towards the blocks (ending 20 mm from the top of the block) and fastened with hot-dip galvanized roofing felt nails (20 x 2.8 mm). Ensure that the underlay is stretched between the blocks! Finally, the ridge is provided with a ridge seal/ridge band (according to the dashed line). In cold attics, the installation of a tight ridge can be performed (not shown). Then the sheets at the ridge should cover both sides of the ridge board and be finally fastened with hot-dip galvanized roofing felt nails at least 20 x 2.8 mm, c-distance 160 mm.
The ventilation under the underlay must not be impaired, and high-placed gable vents must be used, or alternative equivalent openings such as roof vents (hoods).
6. Task against facade
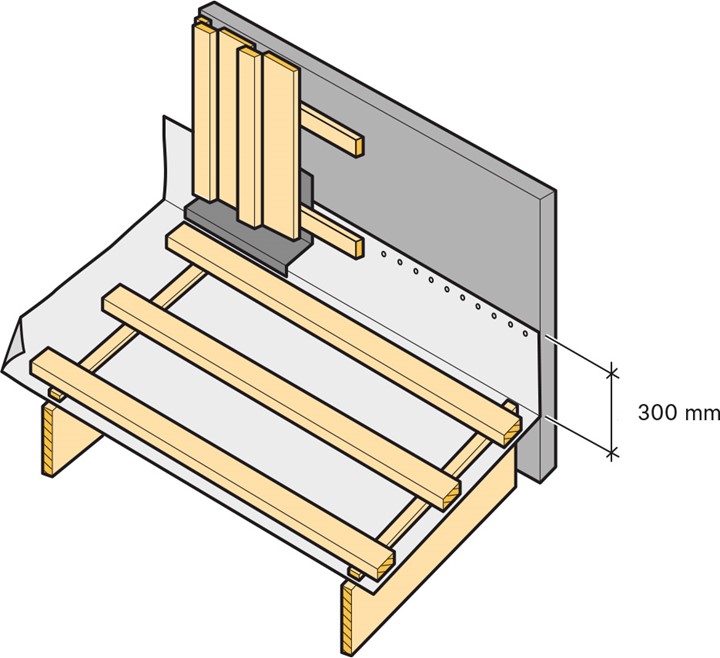
The underlay is pulled up at least 300 mm and fastened with hot-dip galvanized roofing felt nails at least 20 x 2.8 mm, c-spacing 80 mm.
7. Larger penetration
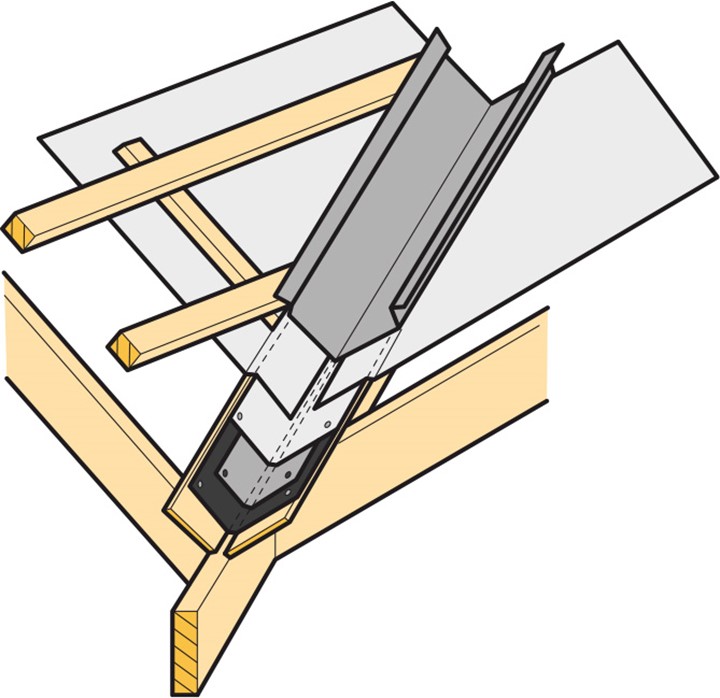
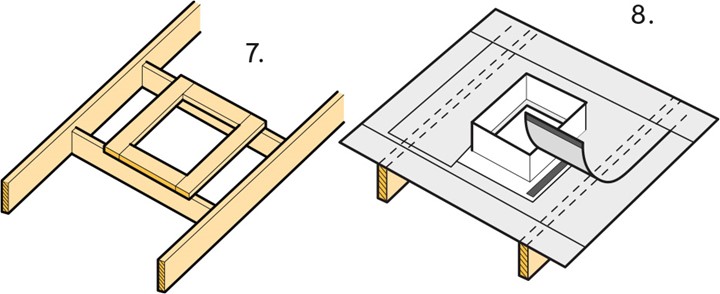
Installations like skylights or chimneys first require trimmers between the roof beams for support and stabilization. Additionally, an underlay with a 150 mm wide collar/foot is required. Install the underlay over and mark the location of the installation. An extra sheet length is placed over the entire roof truss section. The sheet is slid under the upper overlapping sheet. It is easily fastened under the overlap and sealed afterwards if necessary. Fold up the extra sheet and arrange the installation in the lower sheet. Install under the flashing. Cut a flap in the extra overlapping sheet from the top edge
of the underlay and tightly straight down on both sides. Fold down. Attach this overlapping strip with the upcoming battens and double-sided T-Butyl Seam Tape at unfixed edges down to the substrate.
8. Smaller penetration
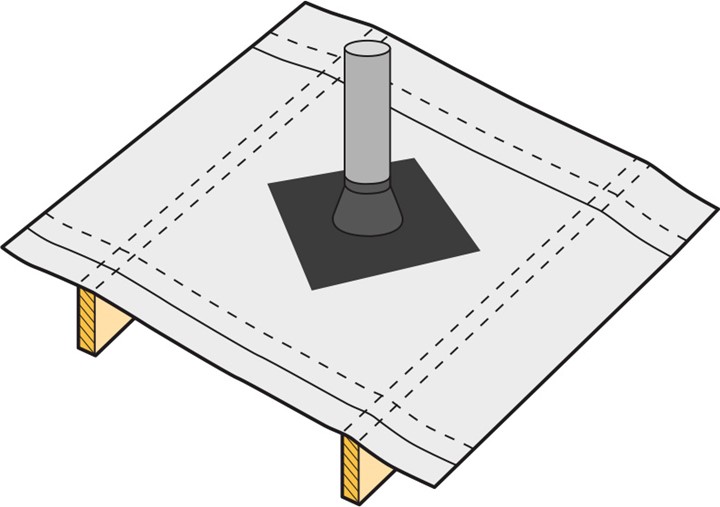
Penetrations such as smaller round air ducts (drains, etc.) are made with self-adhesive collars (T-Collars) in the correct dimension. Mark the center of the hole and make a slightly smaller cross-cut in the underlay than
the pipe diameter. The rubber boot should be pulled over the pipe and the adhesive collar pressed firmly against the surface with one corner angled up towards the ridge.
9. Valley gutter
The valley gutter should have a stable base of construction plywood and for the best fixation a
underlay of sheet metal. The flashing should also be provided with a strip of T-Roof Strip/YEP2500 on the underside. A strip of the underlayment is then placed above the flashing, covering the entire width of the base and the underlayment as well as its entire length. Let each roof side's sheets be pulled over this central sheet with overlap towards the middle. Fasten with double-sided T-Butyl Joint Tape along the entire length of the joint. Finally, install the gutter plate over it. Finish down towards the foot plate as previously described.
