Keep the floor moisture-free
Our floor moisture barrier effectively stops the moisture that can enter the house through the floor. The material is only 3 mm thick, and the moisture barrier is about 6 times more moisture-resistant than a traditional vapor barrier (building foil). Additionally, you get a moisture-protected floor that is insulated, quiet, and comfortable to walk on.
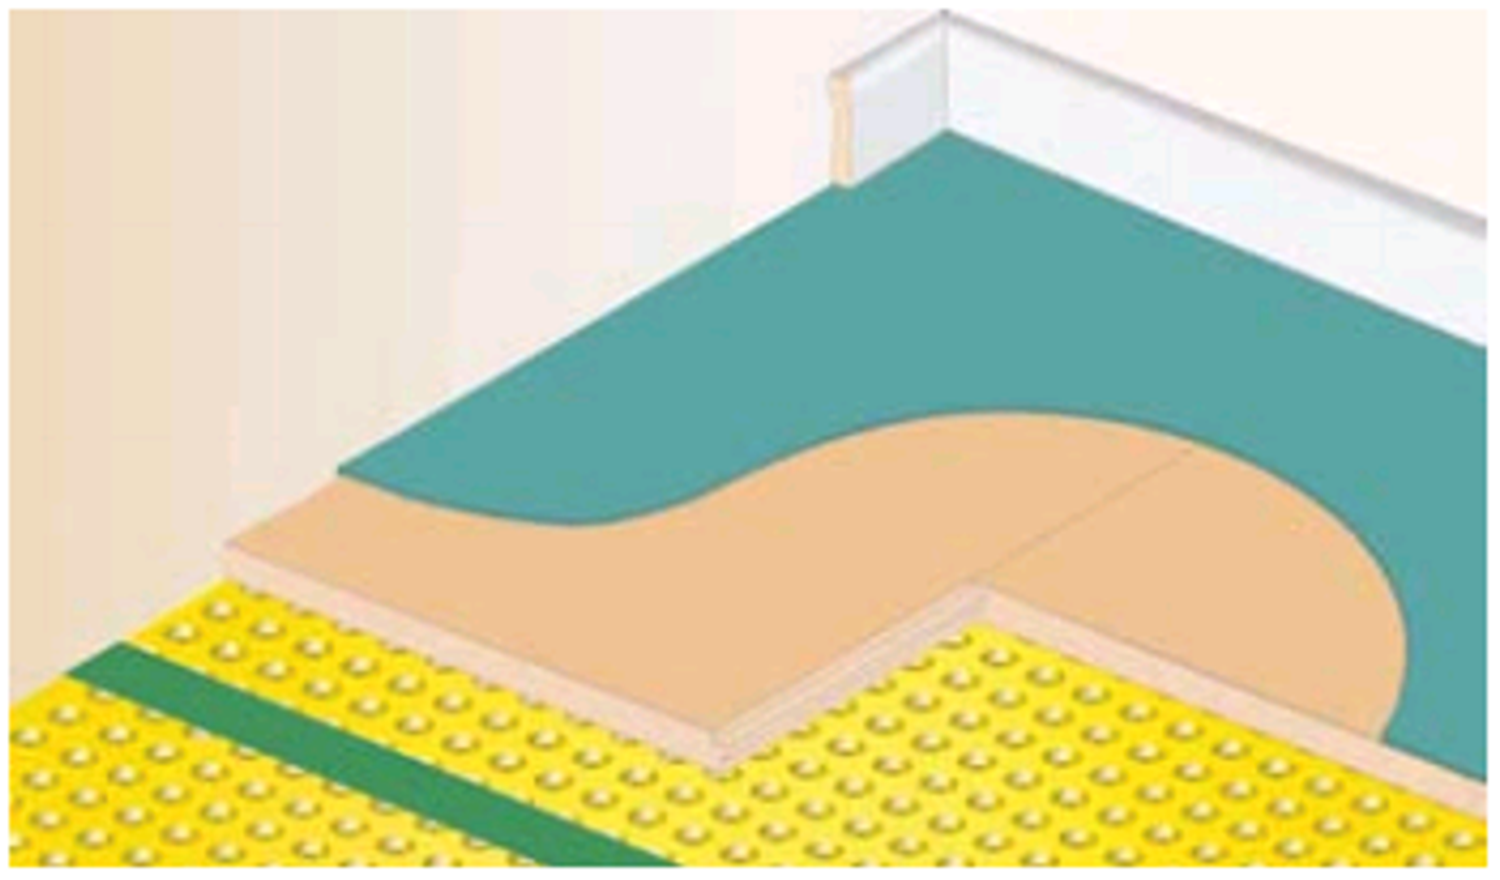
You can combine our moisture barrier with most flooring materials without significantly increasing the total floor height, for example at thresholds. A major advantage of the mat's construction is that it creates an air gap between the subfloor and the top floor. The air gap that forms also acts as a heat-insulating layer. This simple form of heat insulation is sufficient to achieve a more comfortable floor temperature. The moisture barrier also provides a noticeably quieter floor. If you want extra soundproofing or to prevent noise, you can place our fiber cloth under the moisture protection mat. The combination provides a very effective soundproofing layer between the subfloor and the top floor.
Thanks to the moisture barrier, the floor also becomes softer to walk on. This is especially noticeable on concrete slabs. The moisture protection mat effectively absorbs shocks and the inner floor gets a pleasant springiness. The moisture barrier for floors is made of HD polyethylene (pure raw material) of the highest quality; an environmentally adapted plastic material that can be recycled or incinerated with carbon dioxide and water as by-products.
1. Preparation
Before you start laying the moisture protection mat, check that the concrete surface is sufficiently even. The approved tolerance according to Hus-AMA is +/- 3 mm at a 2 m measurement length. Additionally, the concrete surface should be cleaned of all organic material such as wood, paper, soil, etc


2. Soundproofing
If the surface layer is to be laid directly on the moisture protection mat, we recommend that fiber cloth N1 be laid as a sound-dampening layer between the concrete and the mat. The cloth should cover the entire floor area except for the 50 mm closest to the wall. Seams should not overlap! If the intention is to lay foam insulation on top
The moisture protection mat does not require any fiber cloth as a sound dampener between the concrete and the moisture protection mat. Instead, the cloth should be placed between the foam plastic insulation and the board material – to avoid "creaking" or "squeaking" that can occur when the board material is directly on the insulation
3. Installation
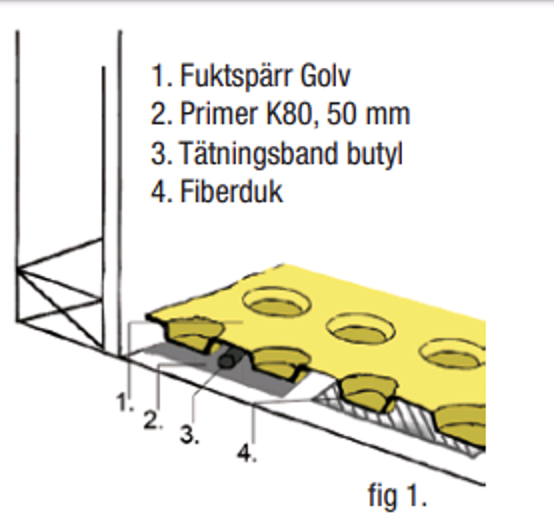
Before laying, the concrete is coated with Primer K-80 in a band approximately 50 mm wide around fixed boundaries such as walls, plinths, etc. The coating is applied tightly against, for example, the wall's sill/sill insulation or the plinth! The application is done on a dry and clean concrete surface and in double layers. After the necessary drying time, the coating forms an adhesive surface for the moisture barrier's edge sealing/sealing tape. Roll out the moisture protection mat with the knobs down against the concrete. Cut to fit against the wall
without folding! Attach Butyl Sealing Tape under the moisture protection mat and at the outer edges against, for example, a wall or baseboard. The sealing tape should be placed between the first and second "knob rows". The protective paper is removed from the sealing tape and the outer edges of the mat are then carefully pressed down against the primed concrete surface (fig 1). The sealing tape should, when the entire floor area is covered with the moisture protection mat, seal around
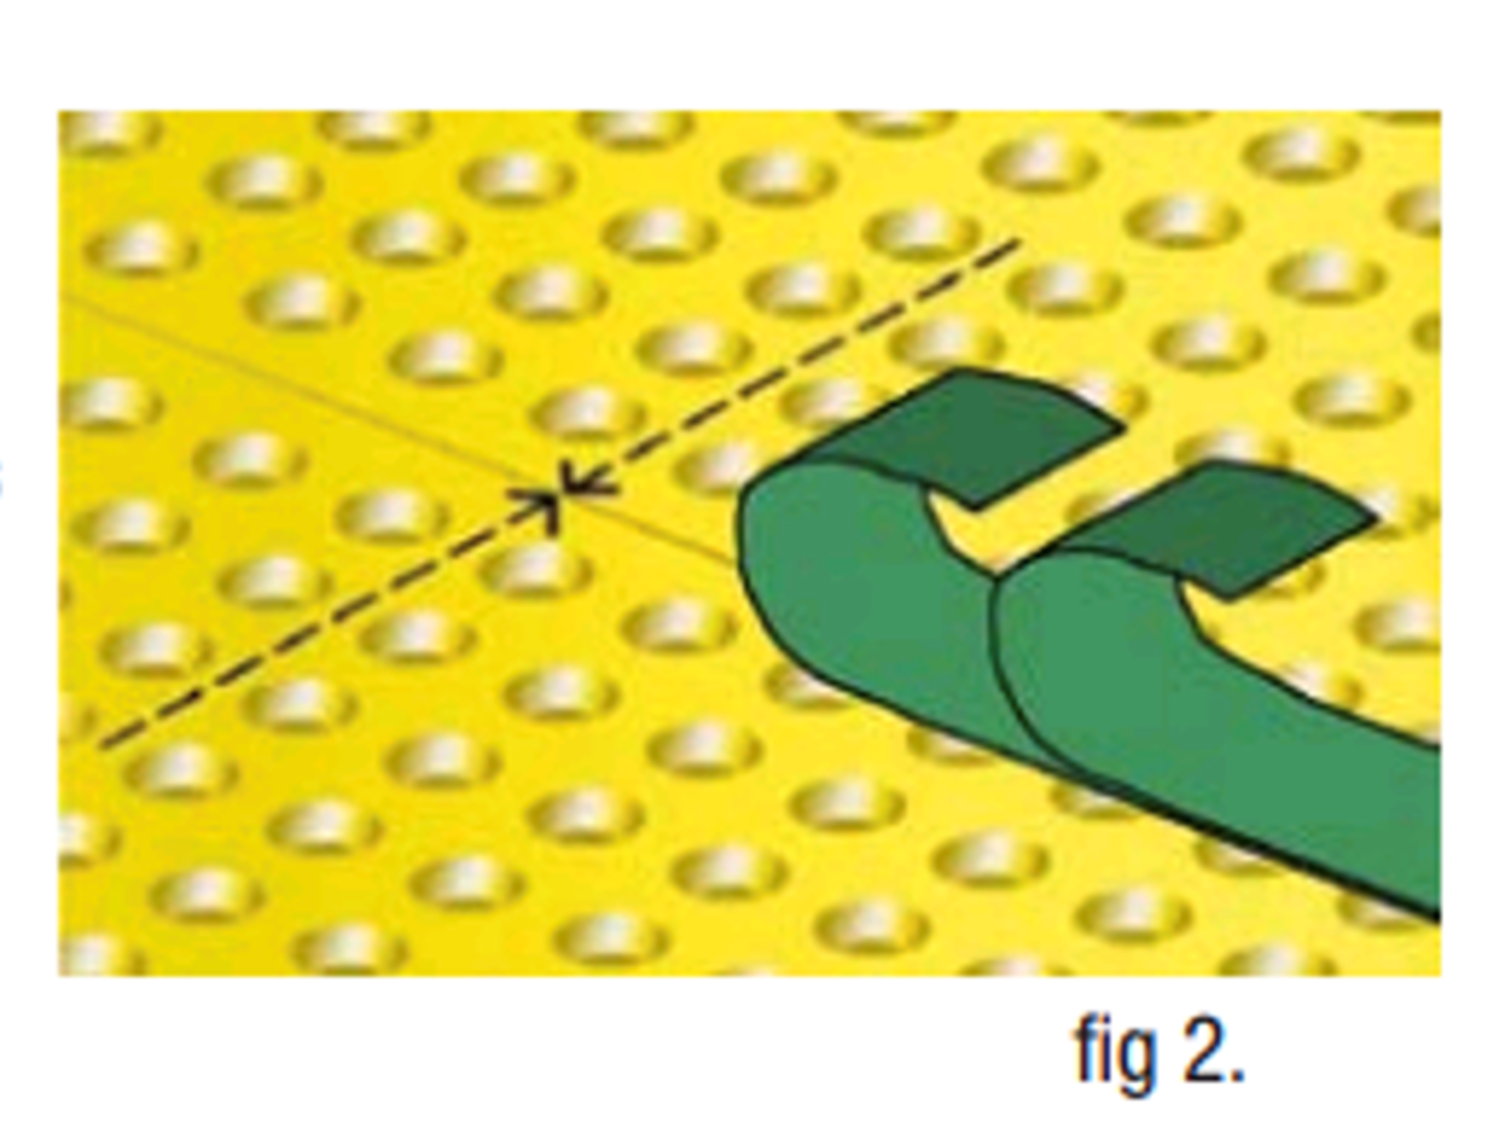
around the edges and finish against the wall or fixed furnishings (baseboard). Roll out the next strip tightly edge to edge, sealed with T-Flex Sealing Tape.
The tape is applied in double layers for the required tightness (fig 2.). Once the entire room is laid, the surface layer/flooring material is installed. The flooring material should be laid in the opposite direction to the longitudinal seams of the moisture protection mat.


4. Penetrations
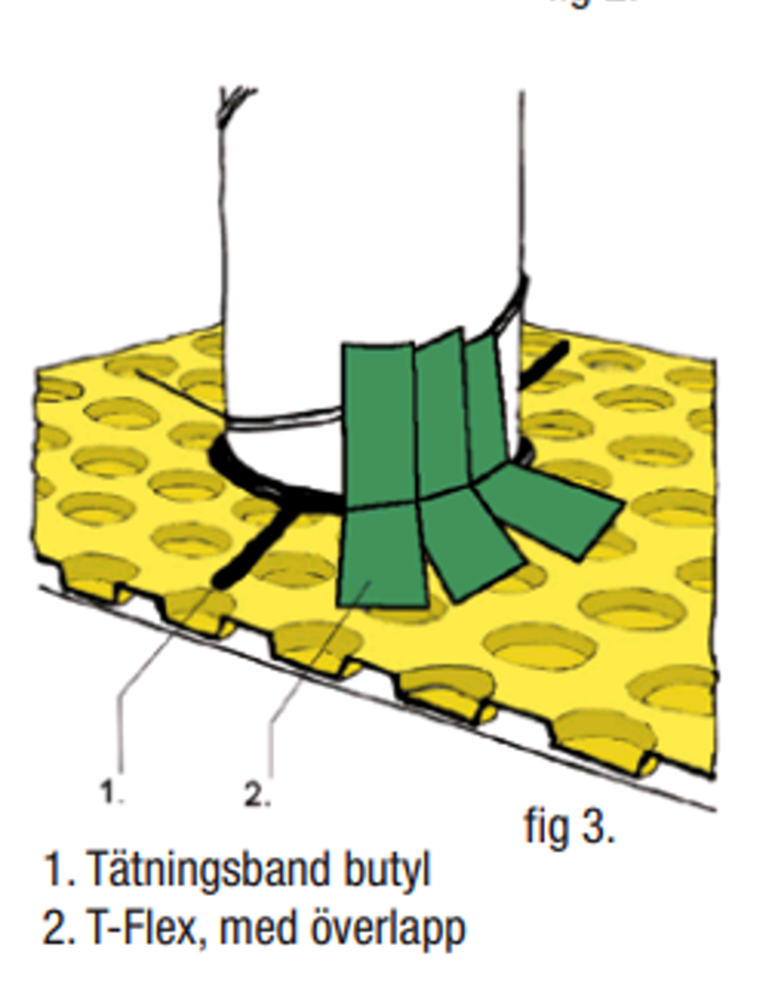
When making penetrations, it is important to ensure proper sealing, which is best done with Butyl Sealing Tape and T-Flex Sealing Tape. Cut a cross in the moisture barrier mat at the center of the penetration. Pull the mat over the relevant construction part, e.g
a pipe and then cut away the excess around it. The connection and cuts are sealed on the top with Butyl Sealing Tape and finished at the top with T-Flex Sealing Tape. The taping is done from the mat up onto the pipe (at least 30mm) and at joints (tape to tape) overlapping at least a few centimeters (fig 3.). Press out the Butyl Sealing Tape carefully and as flat as possible in every cut in the mat! Simple taping with T-Flex over!
Remember
- Avoid walking on the mat to prevent damage and punctures.
- The top floor should be installed as soon as possible after assembly. Otherwise, temporary protective covering should be done with construction board or similar.
- Follow the assembly instructions carefully. Ensure that the necessary tightness is achieved at the outer edges, joints, or penetrations.
- The moisture protection mat should be stored before installation to avoid UV radiation (sunlight). Once installed in the usage stage, the entire product should be concealed.
- Note that any potential moisture is not ventilated away with this passive method.
- If there is uncertainty about the moisture content of the subfloor, a professional should be contacted to perform a moisture assessment and suggest measures.
- Use only compatible and approved accessories.


