A Secure Foundation Protection
It is important that the transition from the outer wall to the foundation is airtight and moisture-proof. Therefore, we recommend our radon membrane, Radonmembran Super, which consists of a specially manufactured multi-layer polyethylene (LD-) film with a friction coating on one side. The membrane is aging-resistant.
We have fundamental knowledge about foundations and foundation protection. We offer crawl space foam, T-Barrier, Sill Insulation, and Radon Membrane Super. When it comes to casting, we have both concrete cover mats and form tubes in many different sizes. Here we will focus on how to install Radon Membrane Super.
The radon membrane is installed comprehensively with the friction coating facing upwards on foundation, floor structures, or in the ground beneath the foundation structure. The membrane forms a durable and airtight system.
1. General Installation
The installation can be done on top of the concrete slab (A1.), alternatively directly under the concrete slab and up on a so-called base element (A2.), under the entire concrete slab against the foundation insulation (B.), between foundation insulation layers (C.) or in the ground at the excavation bottom (D.).
The surface must be stable, smooth, and free from sharp objects or organic debris. For installation according to option D, it is required that the excavation bottom is leveled, stabilized, and executed to ensure water drainage from the membrane to the ground outside the foundation
outer edges. Standing water must not occur.
Other work is carried out according to practice (see AMA construction). The membrane should be protected directly underneath (against the bottom) and above (against fill materials) by layers of geotextile class N3. The membrane should be laid approximately 2m outside and around the outer edges of the foundation.

The best conditions for an airtight and radon-protective solution are achieved in new construction where the radon membrane can shield the foundation surface as comprehensively as possible. Joints and penetrations should be sealed to prevent radon gas from seeping into the building.
2. Joints
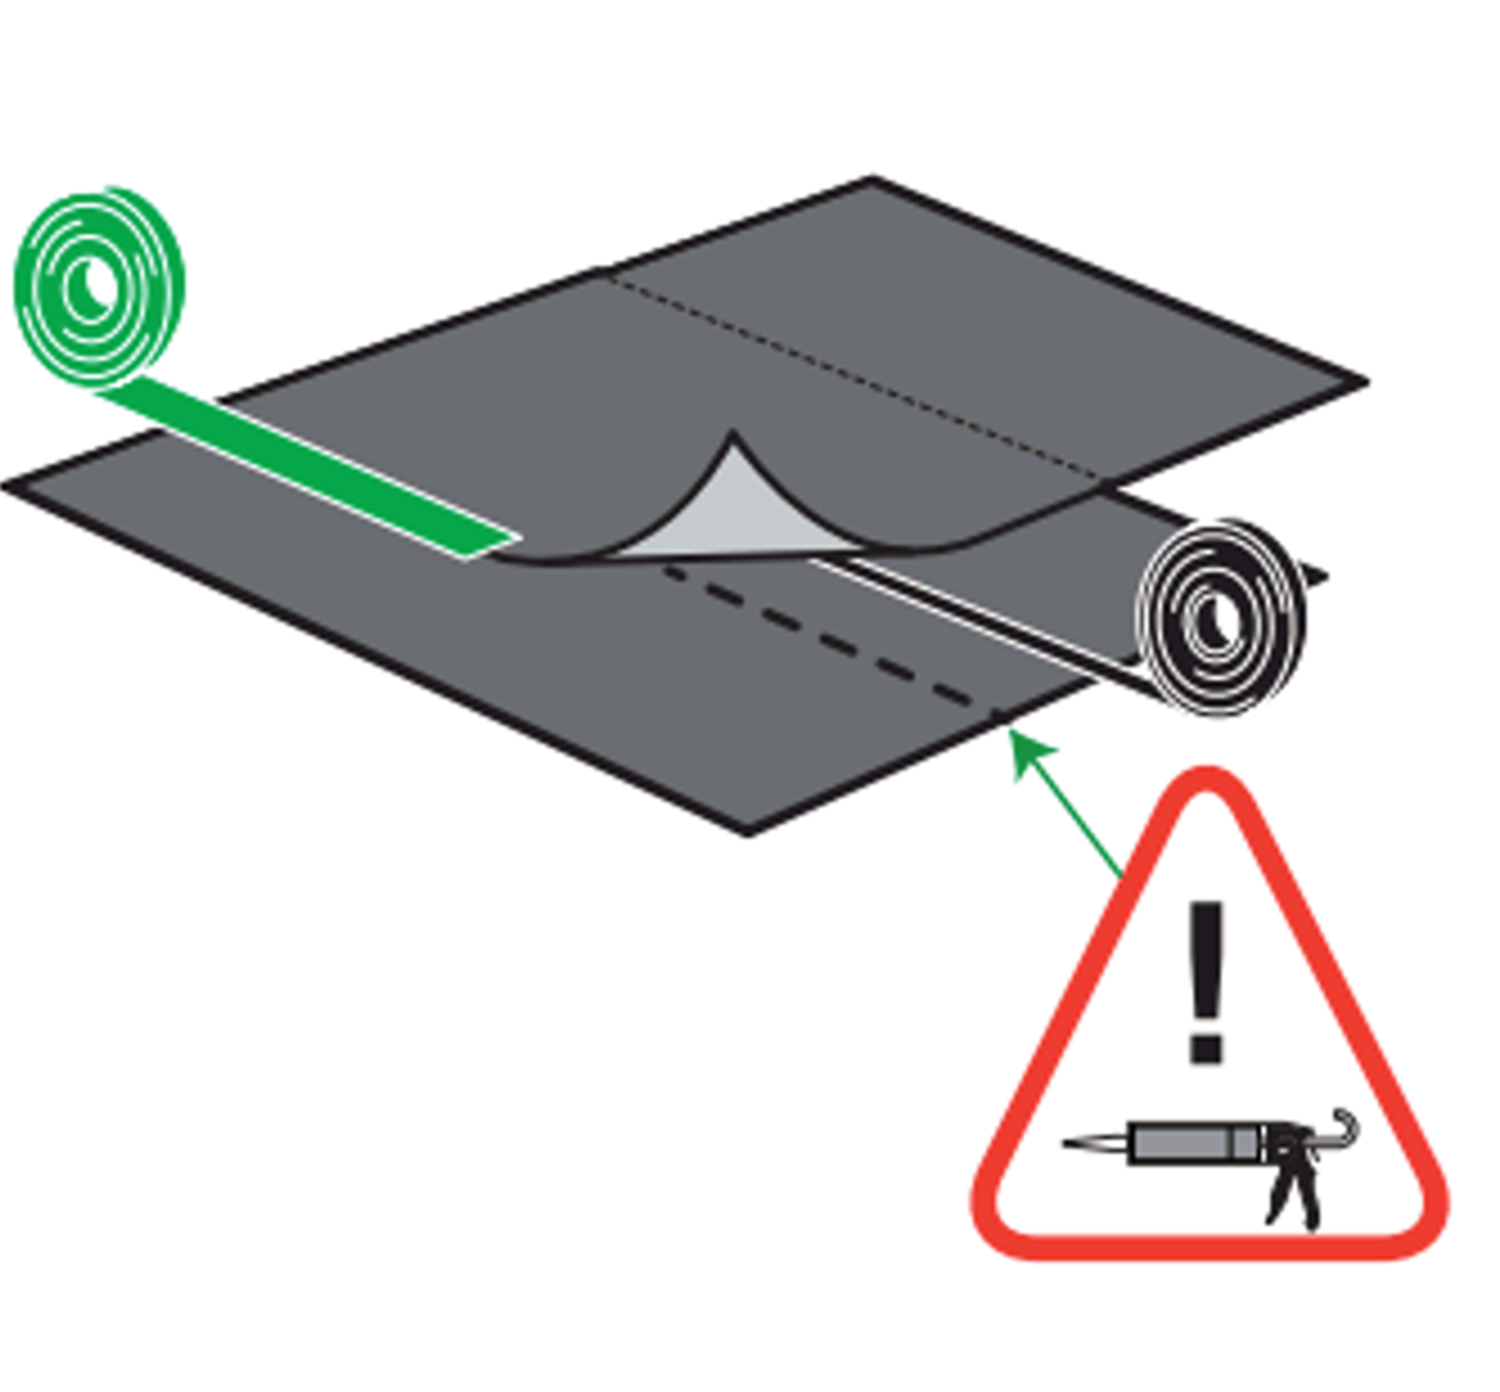
Joints in the membrane are made with a minimum 200 mm overlap with accompanying sealing. The sealing in the system consists of a double-sided Butyl Joint Tape placed in the middle of the overlap. Press the butyl tape firmly against the substrate with the protective paper on. Ensure it adheres and then remove this protective paper. Secure and press the overlapping membrane sheet carefully.
In colder weather (<5° C), supplement the joint tape with butyl compound in a strip about 5cm from the edge. Finish by completely sealing and protecting the joint edge with the single-sided Sealing Tape T-Flex. Application is done carefully with hand pressure or roller.


3. Penetrations
Sealing of round penetrations is most easily performed in the system with associated collars. The collar will overlap the hole in the membrane and form a tight connection to the pipe or hose. Rubber collars with a self-adhesive underside of butyl adhesive (according to 3:1) are available in various standard diameters. Remove the protective paper under the collar. Press the collar down onto the surface and fix the collar with a roller. Rubber collars that are not self-adhesive (according to 3:2) are mounted similarly but are glued to the surface with accessories such as Butyl Joint Tape or T-Fix butyl compound in three strands with completely sealed rings. 3:2 is taped after curing, protected at the outer edge with T-Flex Sealing Tape.
Seal the top of the rubber sleeve around the pipe/cable with either a hose clamp or butyl joint tape. Achieving airtightness at the top and bottom of the penetration sleeve is important.
Remember
• Surfaces to be taped and sealed must be clean, dry, and grease-free.
• All joints and penetrations must be tight and completely sealed to achieve proper functionality in radon protection.
• As a splicing aid, use only the accessories recommended in the system.
• The assembly should be carried out at temperatures that favor the application of joint aids such as tape, butyl compound, and sleeve. In cooler weather (<10 °C), preheat all components before assembly. Heat
carefully with a heat gun during application if needed. At temperatures <5 °C, complete the sealing of
the joint with butyl compound.
• The membrane should be inspected for damage before installation/covering. Any damage should be repaired and sealed with joint aids and/or a possible patch piece of the membrane.
• The use on moisture-prone surfaces (such as concrete) should be sized according to its moisture content. The membrane
exhibits waterproofing properties equivalent to a so-called Moisture Barrier (see reported vapor resistance) and shall
thereafter be used.
• Ensure that any fill material above the membrane is radon-free.
• In case of uncertainty regarding radon measures or moisture problems in the foundation, contact an expert for consultation.
• The products should be stored away from sunlight and precipitation, and at normal storage temperature.
• After installation, all components of the system should be incorporated into the structure as soon as possible to protect against
sunlight (-UV) and precipitation.


